Two Holt: Our little mountain cottage
  • Two Holt: The story begins
  • More "Before"!
  • Two Holt Blog
  • FAQ: Why did you name your cottage "Two Holt"?
  • Sights, Hikes, and Food!
  • Two Holt Recipes
  • 2012 Highlights
  • 2013 Highlights
  • Instant Pot Recipes
  • Girls Only Hikes!

Boxwood Blight

10/15/2018

1 Comment

 
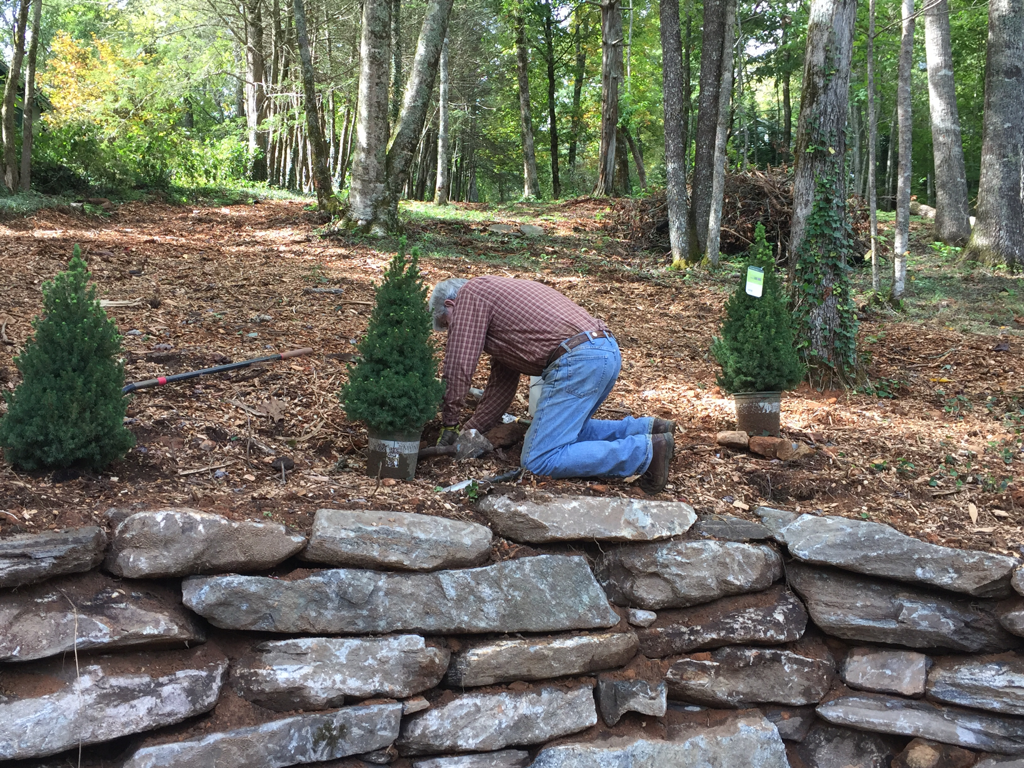
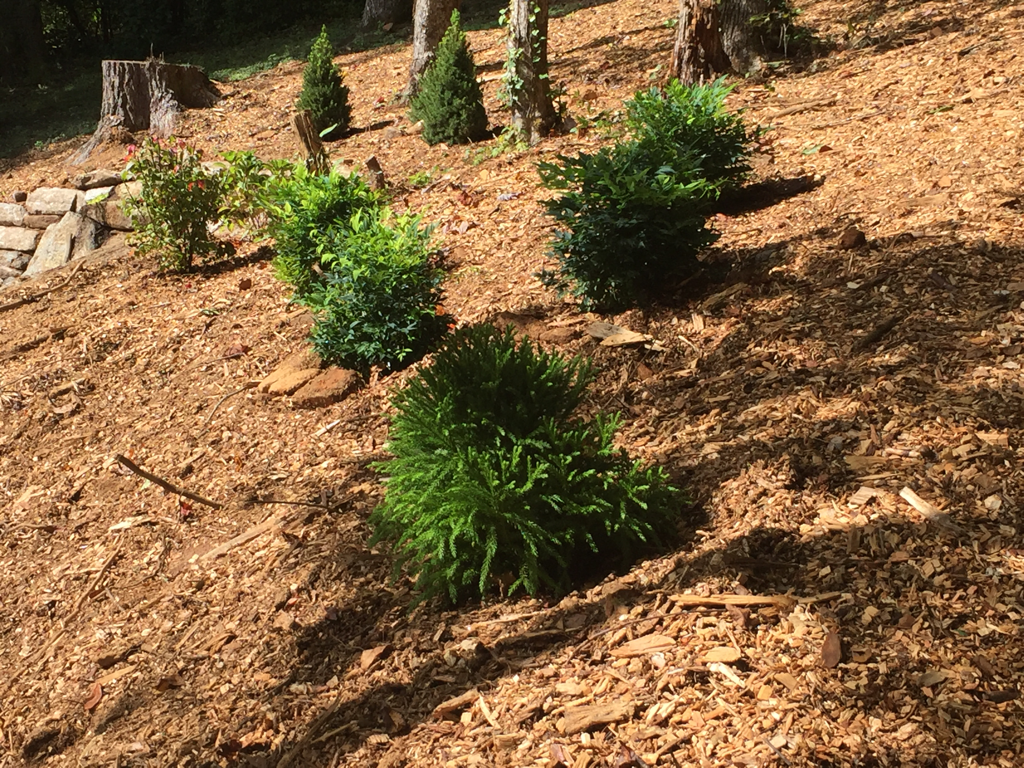
I love boxwoods! Two Holt’s original owner, Mrs. Cora, planted three boxwoods 50 or 60 years ago which became the evergreen ‘bones’ of our side garden. We added three more boxwoods to this garden as Two Holt grew in size. We even rooted three boxwoods from clippings, nurtured the rootings in small pots for a year or two, and transferred the small boxwood plants to our garden last year. From the history of the oldest boxwoods to the nurturing of the cuttings into new plants, we have a definite connection to the boxwoods in our garden. These pictures show how the boxwoods added to our garden...
Picture
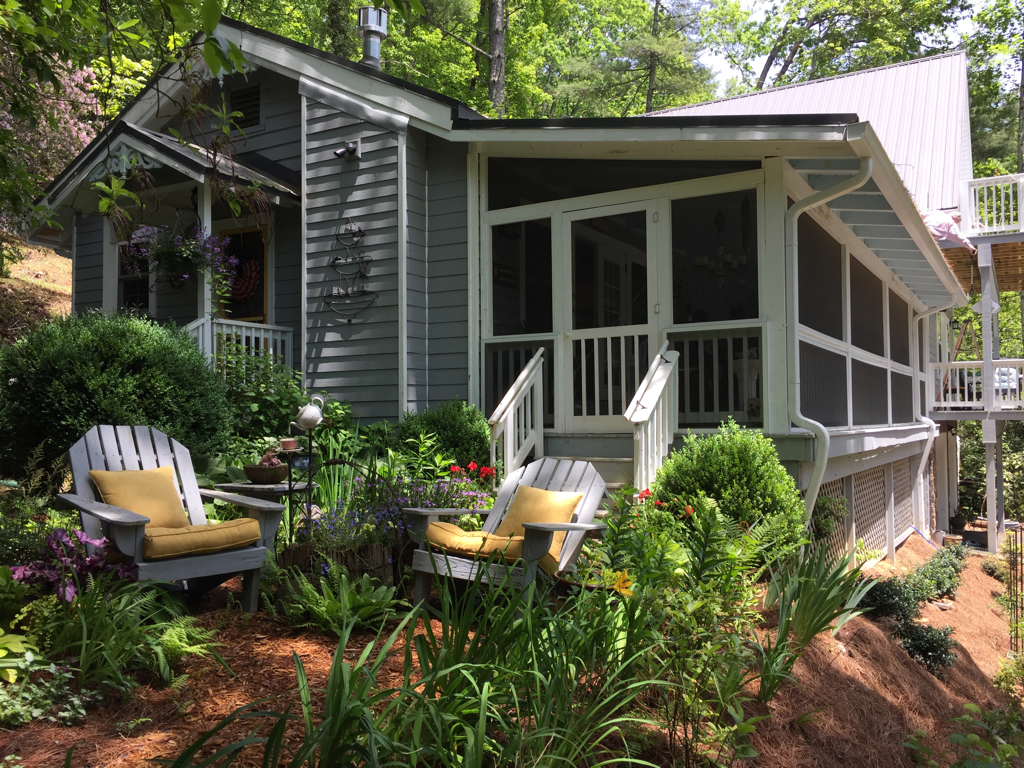
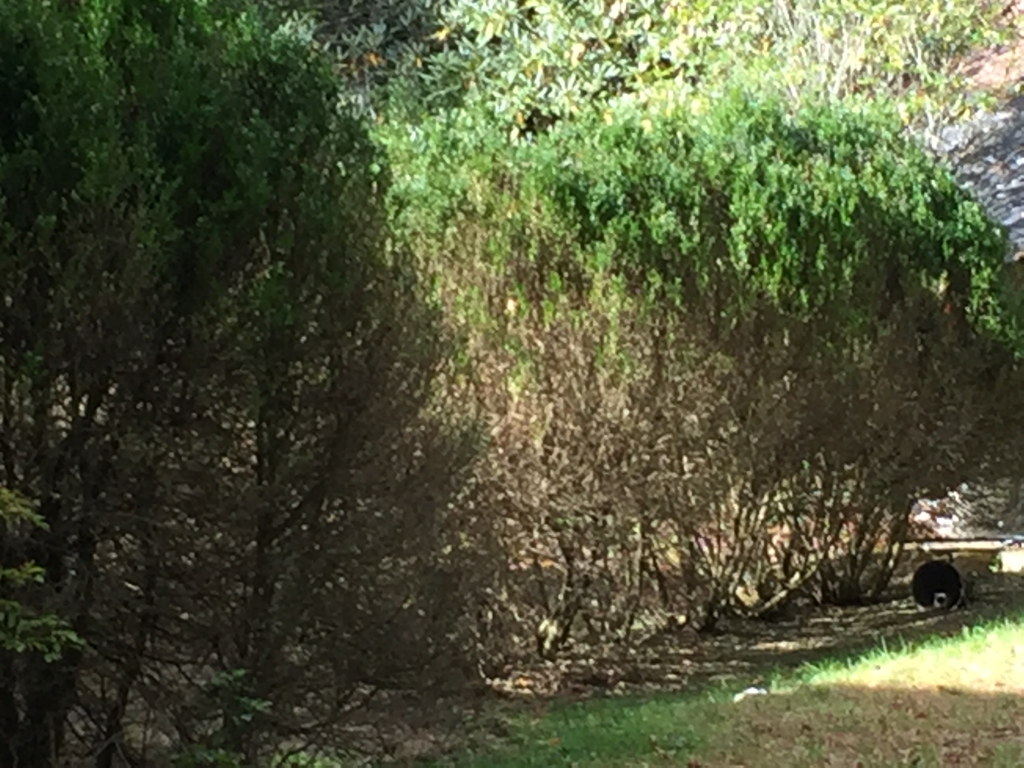
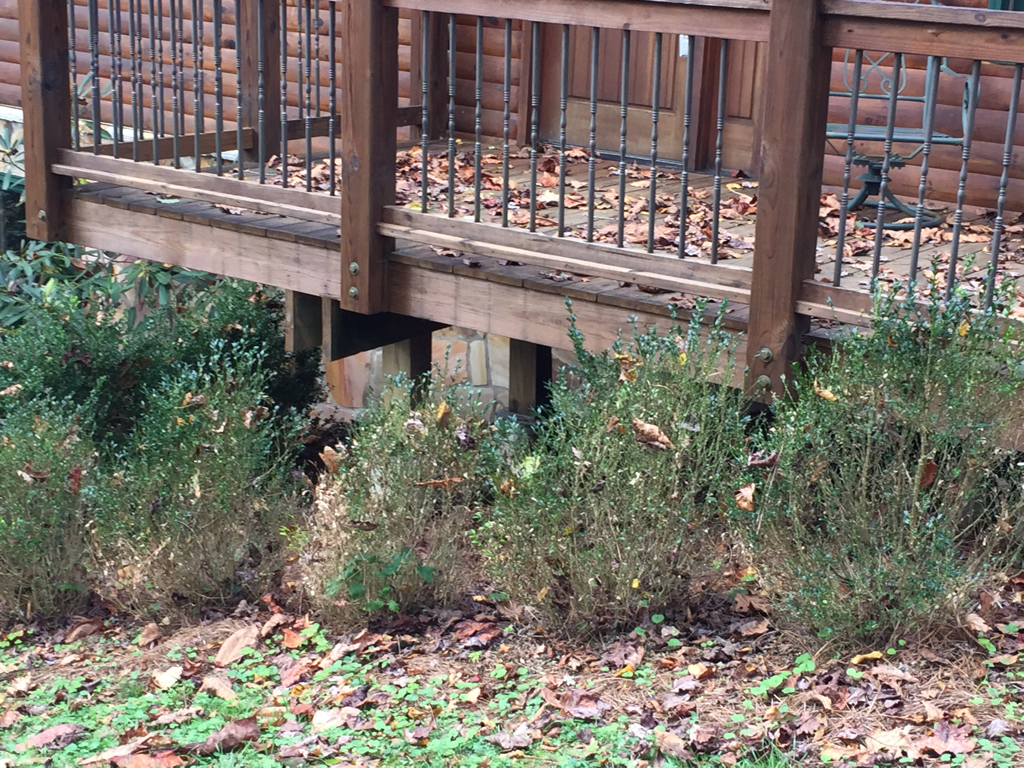
Boxwoods beside the railings
Picture
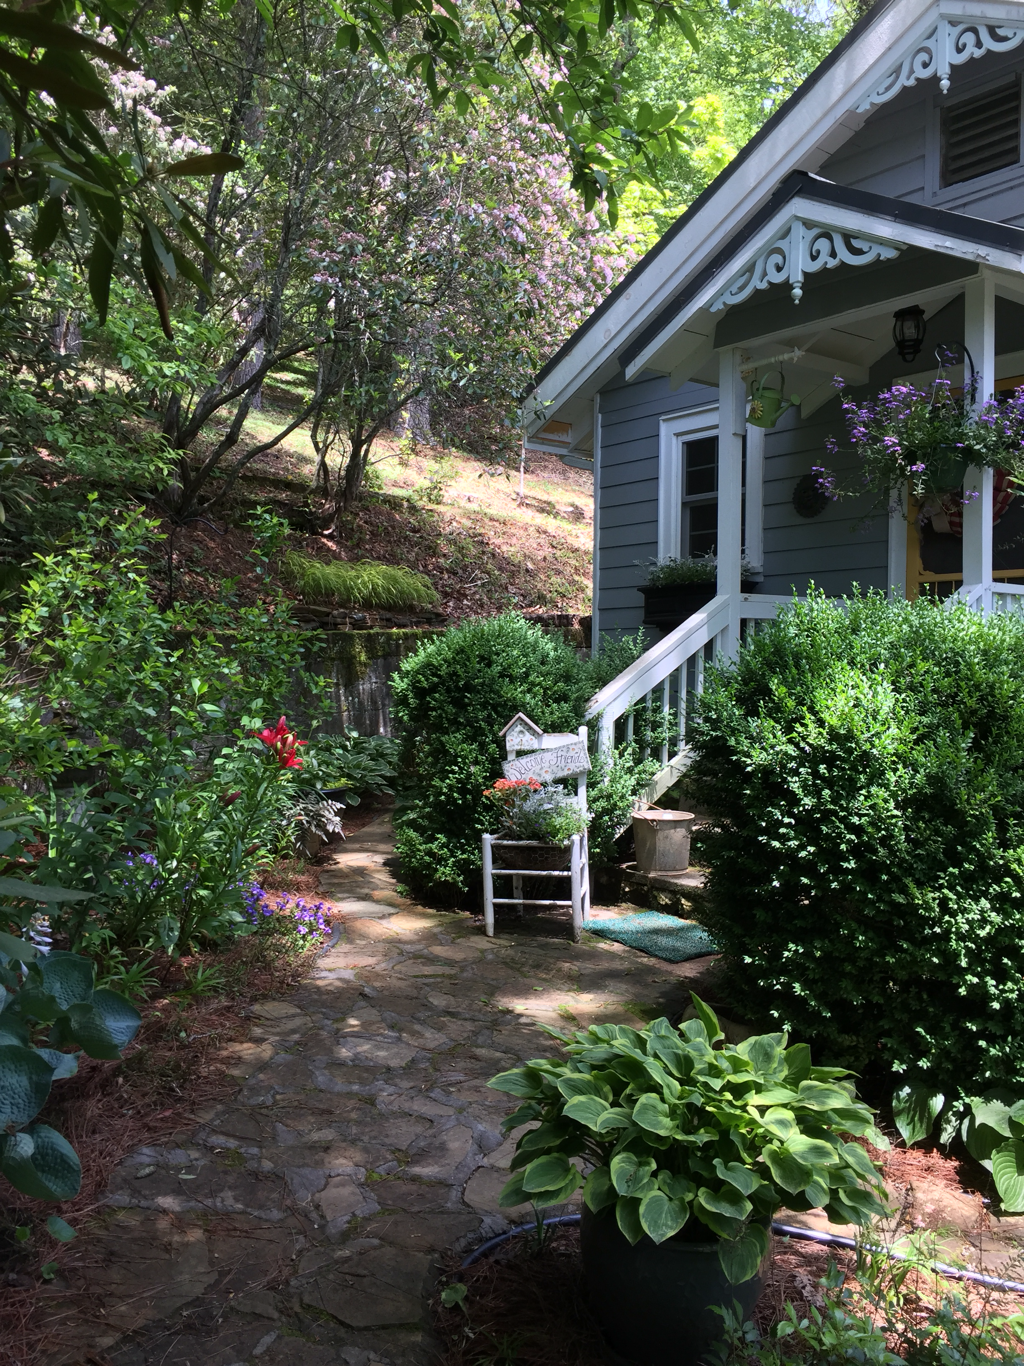
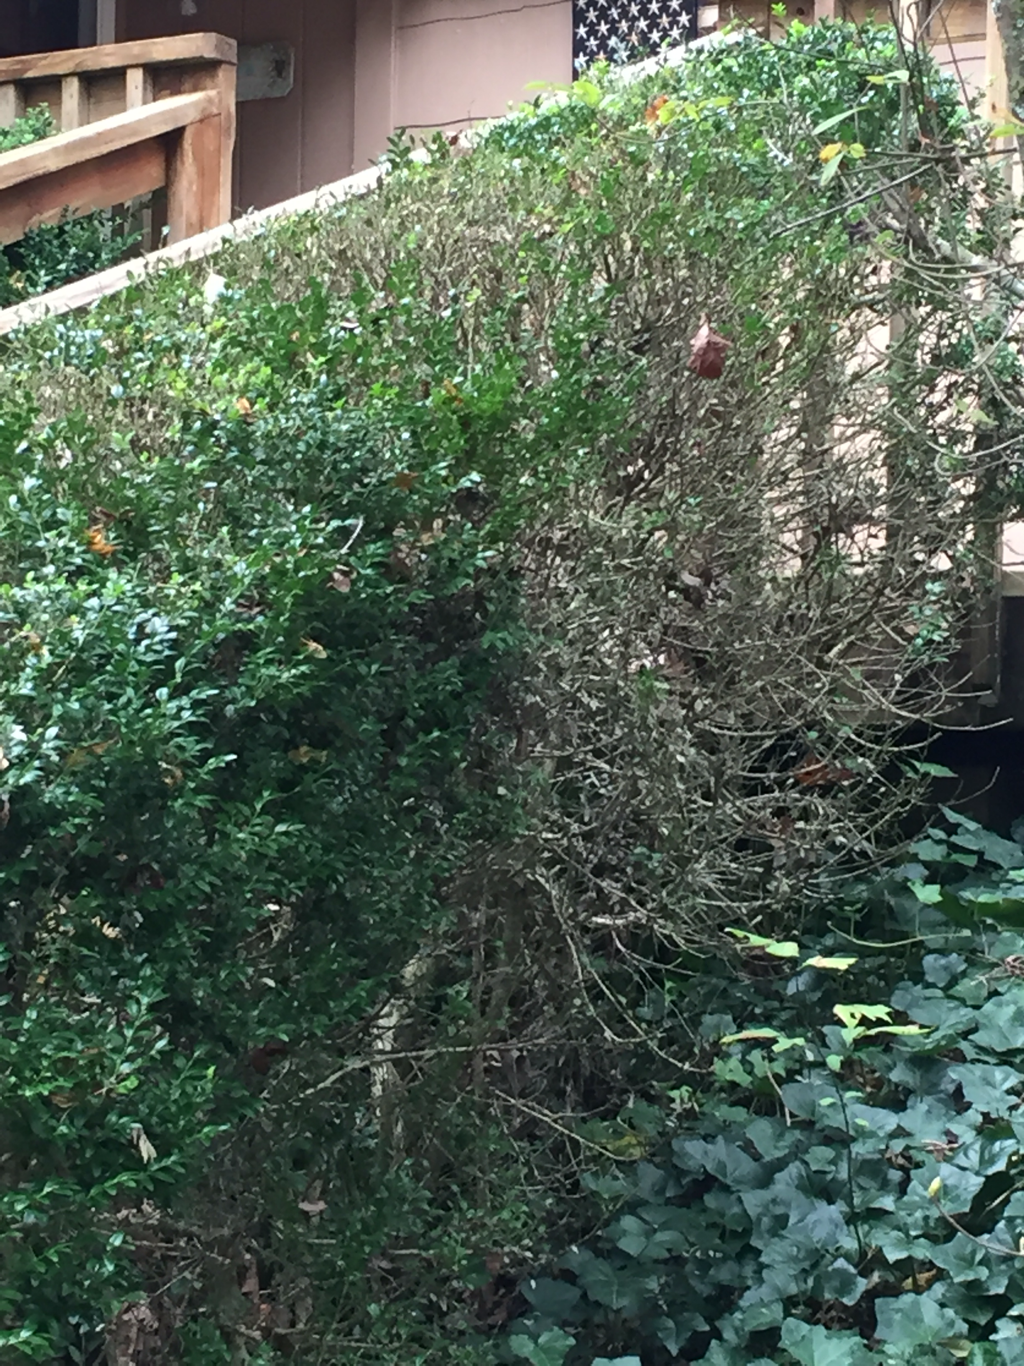
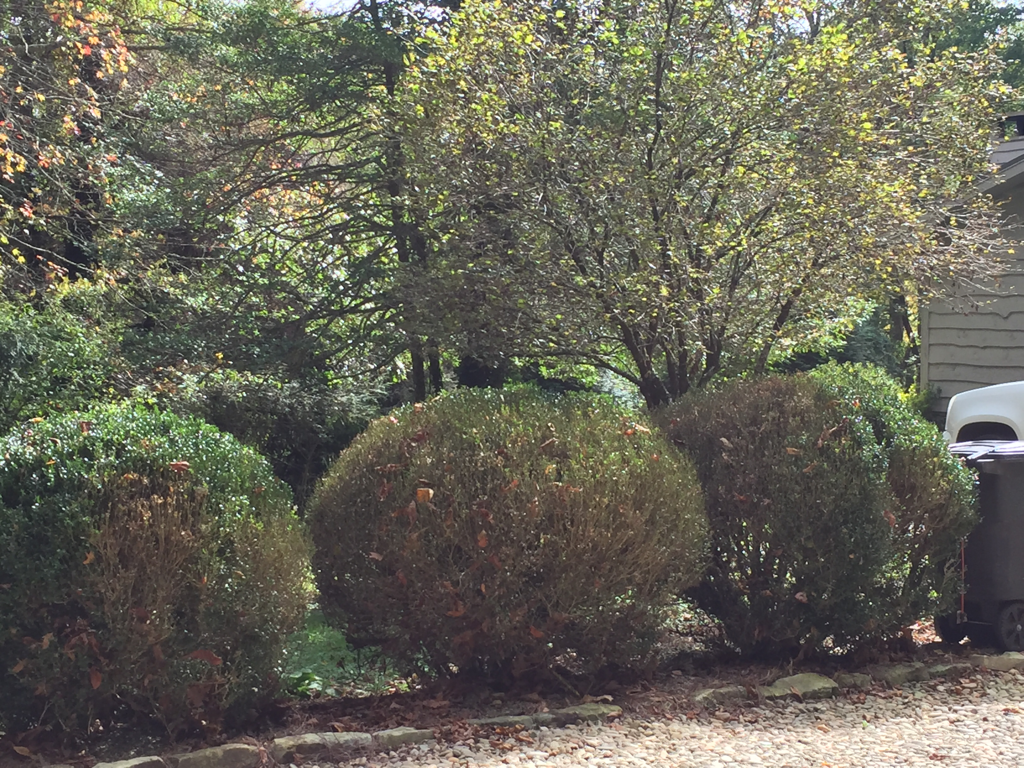
Boxwoods by the railings and at the corner of the house
Picture
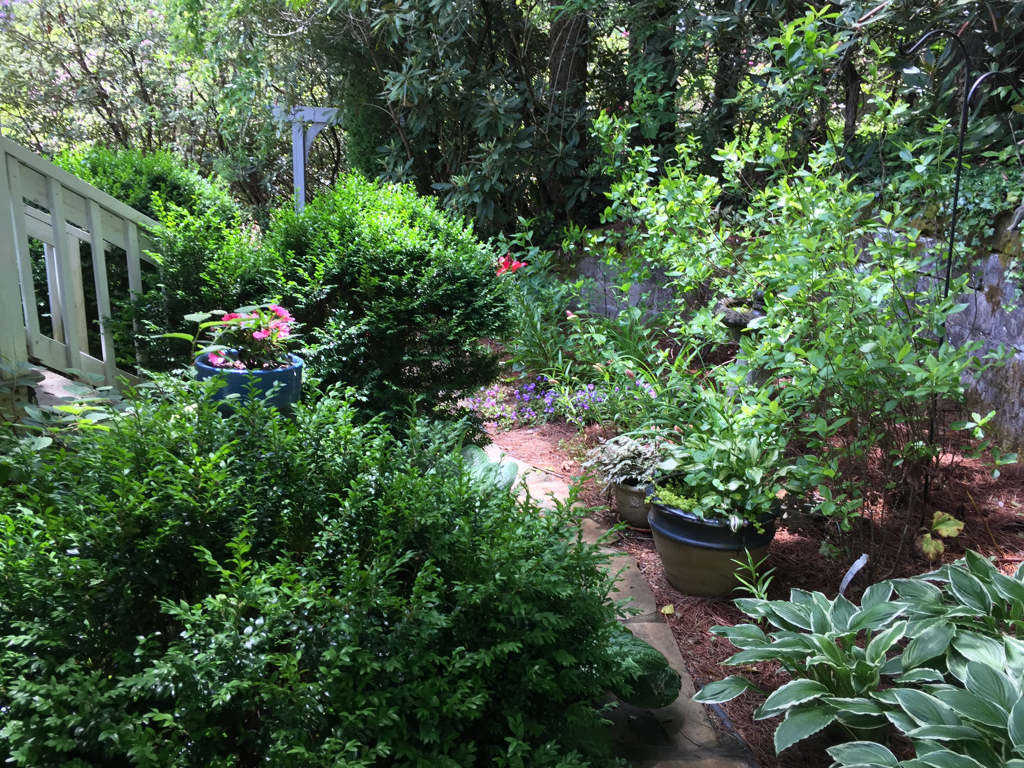
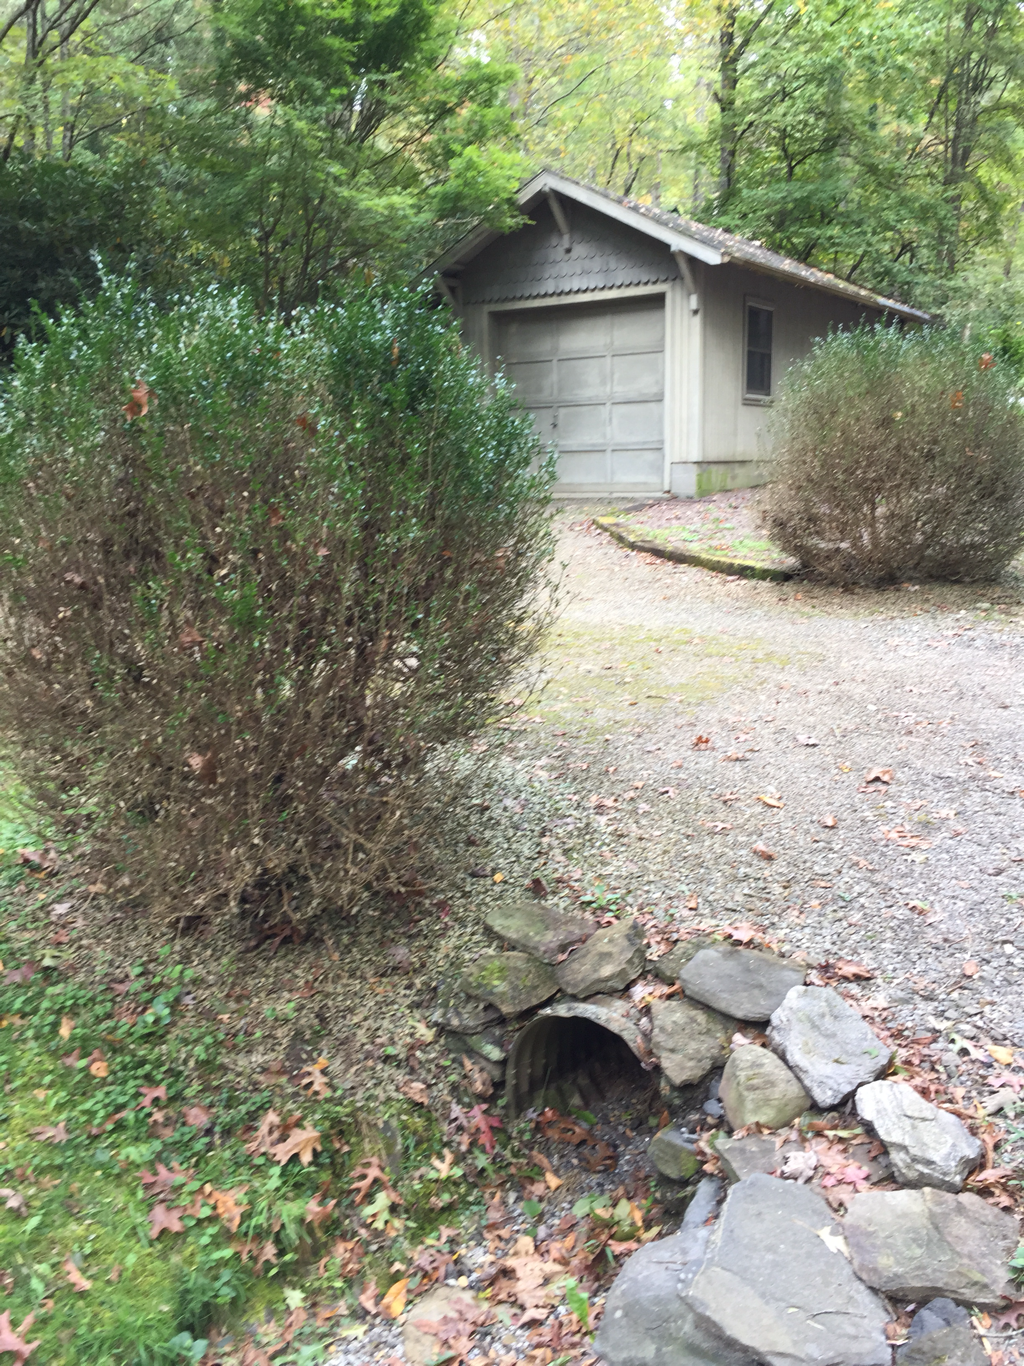
Another view of the boxwoods
Picture
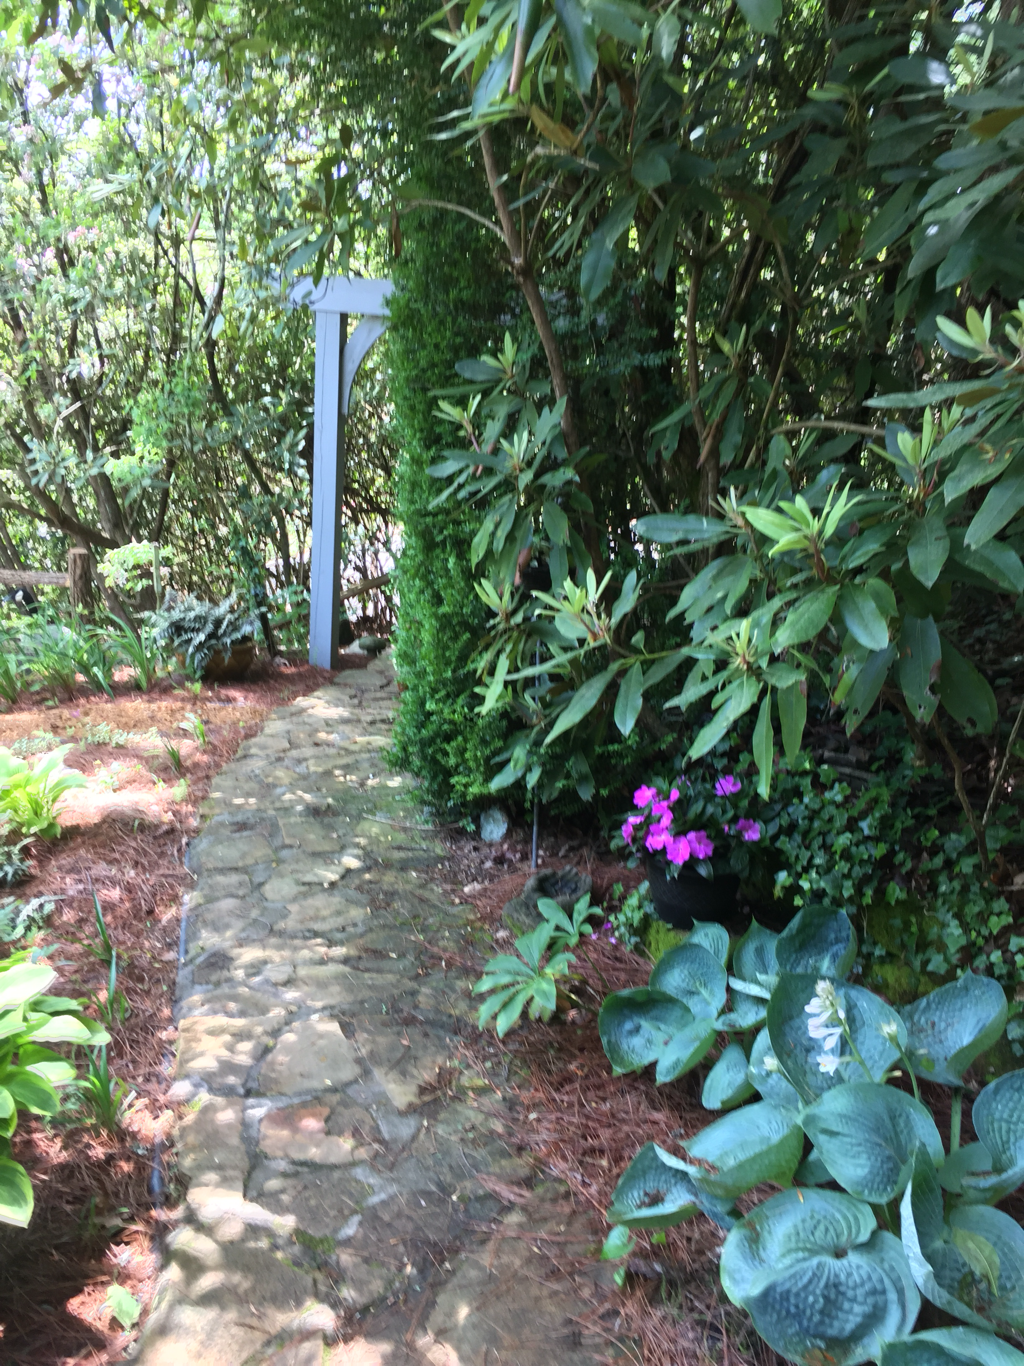
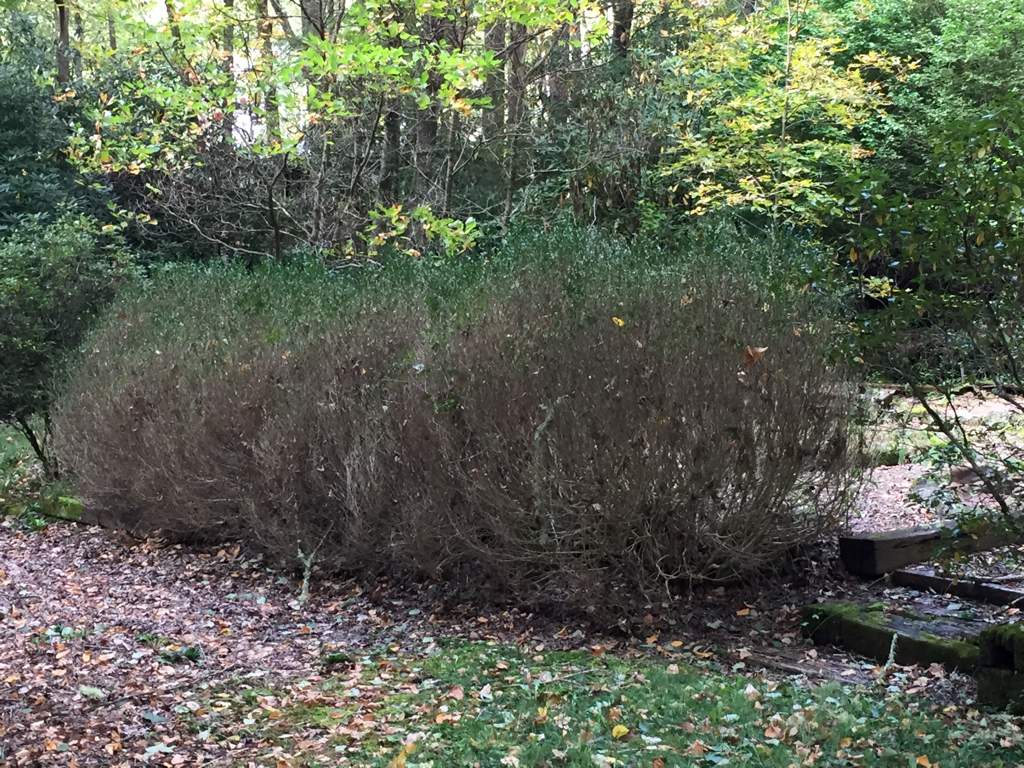
Look at the height of the boxwood on the right side of the stone path
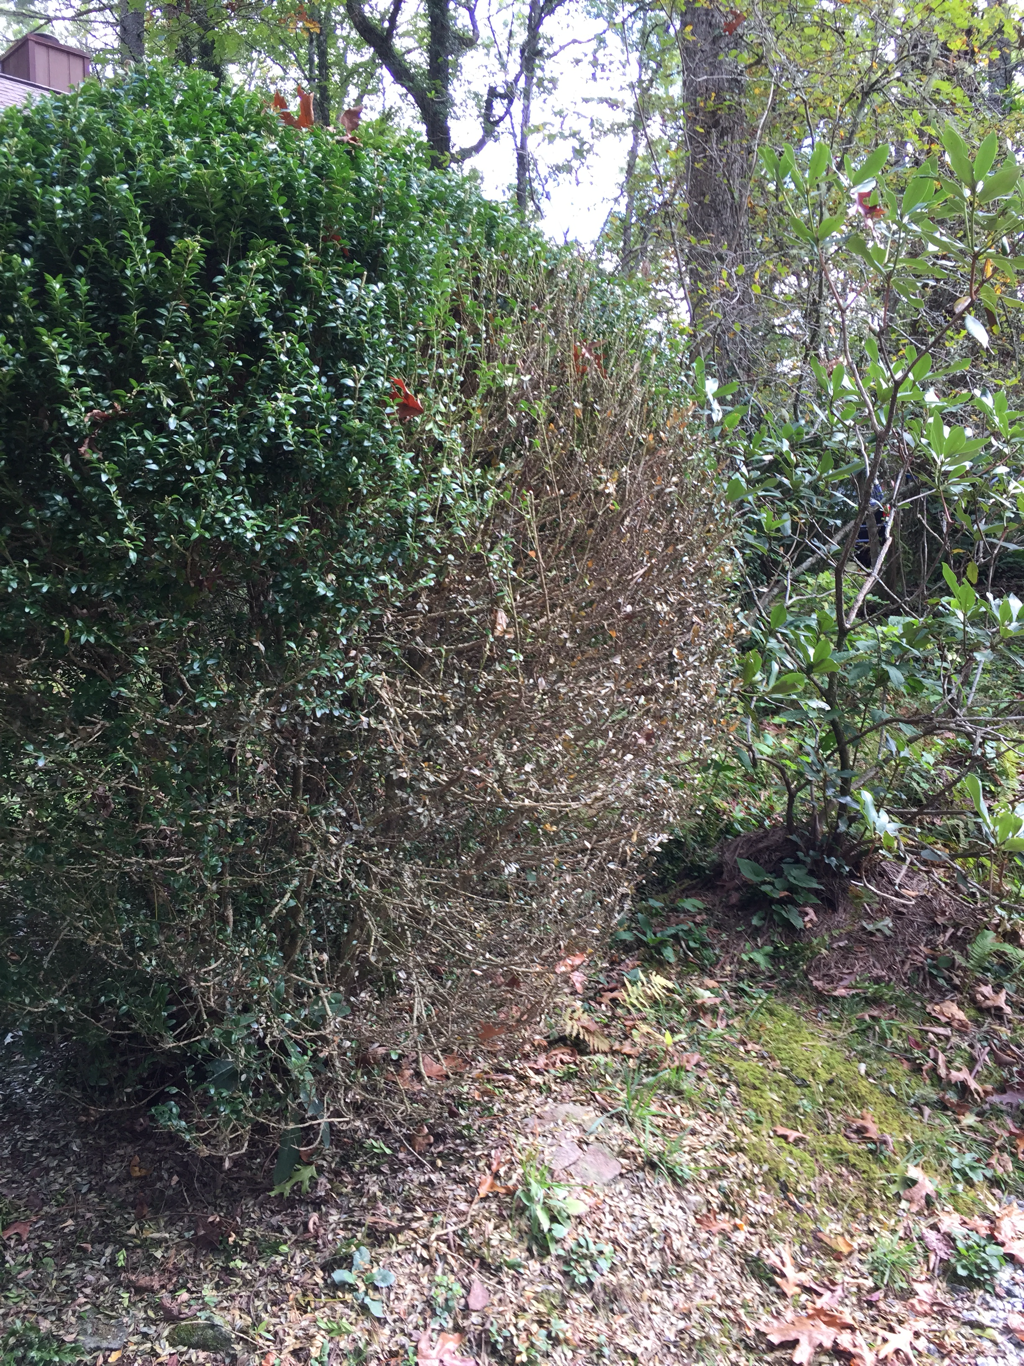
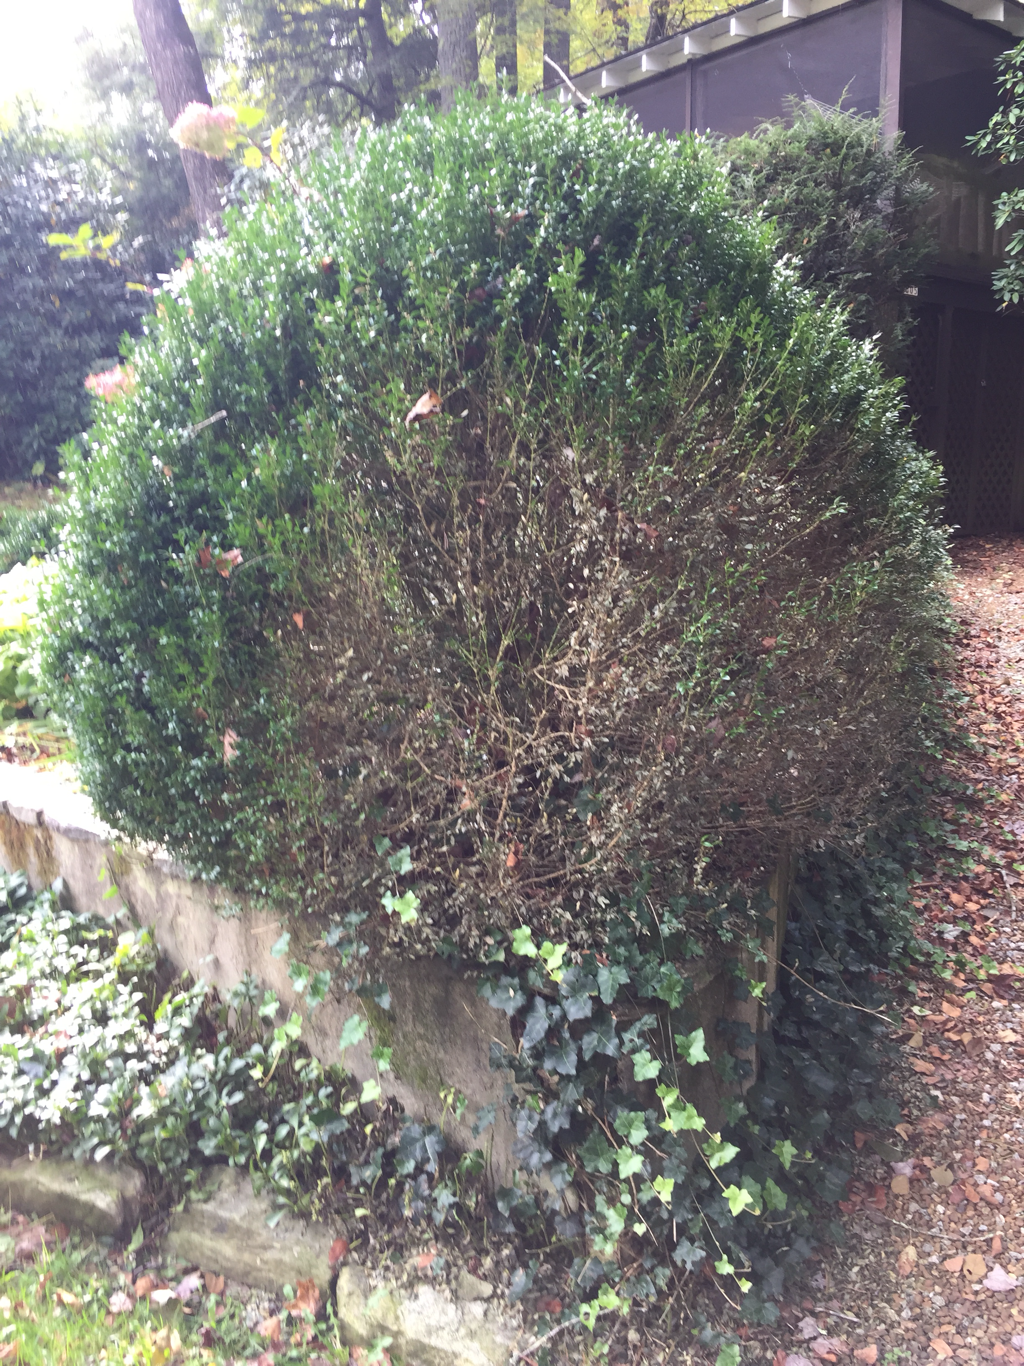
These boxwoods are beauties so I panicked a bit when I noticed a small dead area on one of our oldest boxwoods. Then I noticed a larger dead area on another of the oldest boxwoods and yet another on two of our younger boxwoods. I had a sick feeling that a relatively new disease, Boxwood Blight, was attacking our boxwoods.
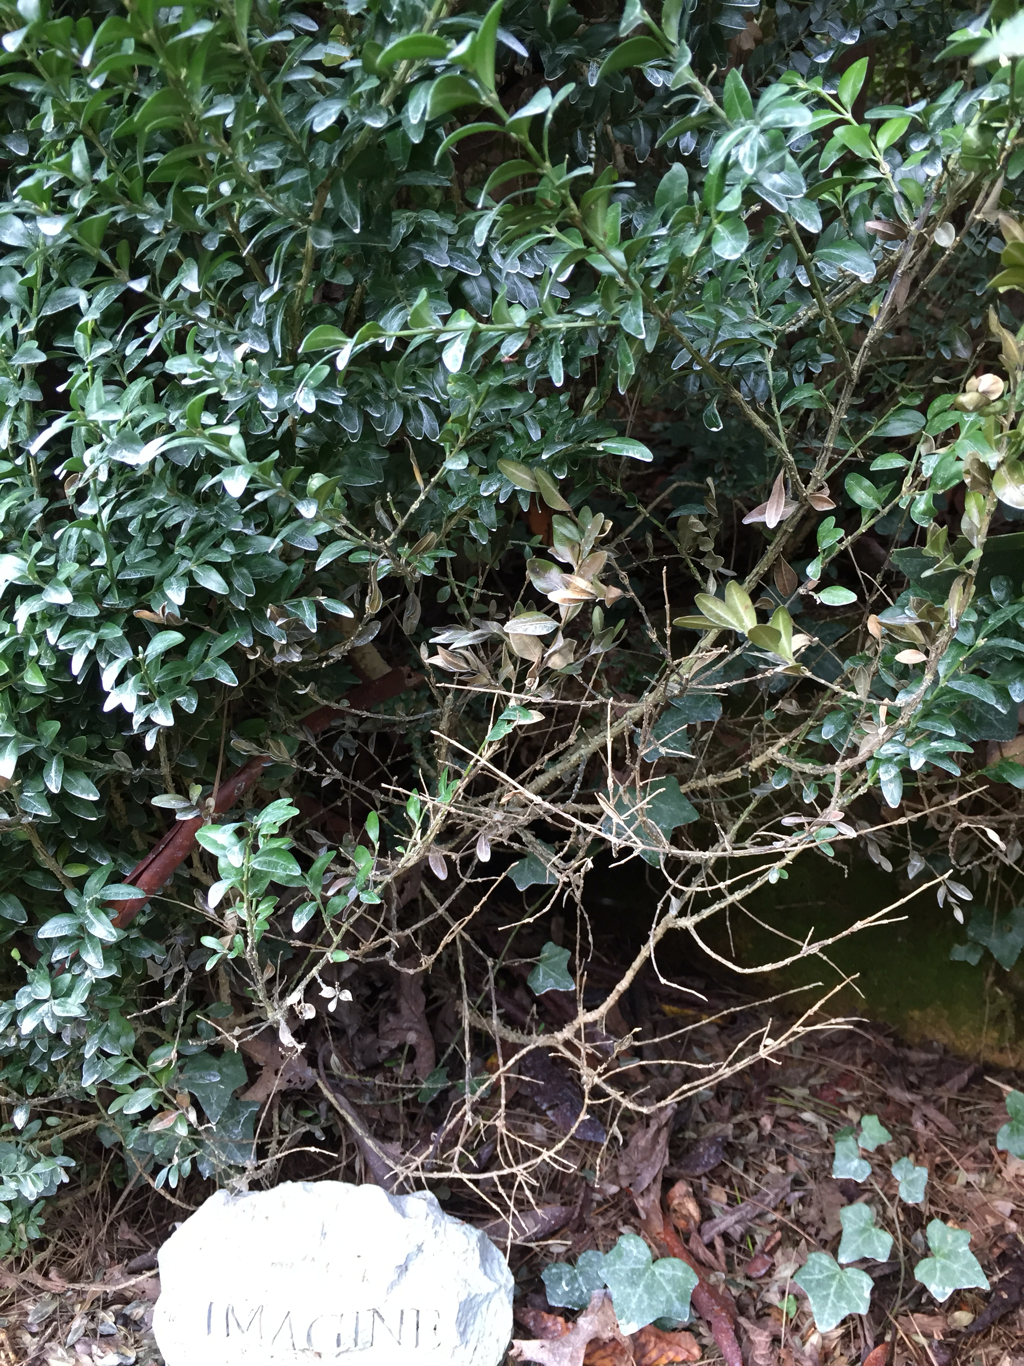
Picture
The start of blight
I went straight to social media to ask more knowledgeable friends if this was blight on my precious boxwoods. I had several answers that it was indeed blight and there was no hope... pull them up and burn them. But then along came neighbor Brian. Brian shared that he was working with North Carolina State faculty members on Boxwood Blight and that he, himself, had a degree in agronomy with an emphasis in plant pathology. He got my attention quickly!
Brian came by the next day and assured me the boxwoods could be saved if I followed a treatment plan. He
showed me how to treat the boxwoods, left me with some chemicals and a written plan to treat my boxwoods. We have been faithfully treating our boxwoods weekly as he suggested. I’ll share his plan at the end of this post. Brian is THE man!
But first let me take you on a tour of our little Mirror Lake community. Boxwood Blight can take an otherwise healthy boxwood out in a couple of weeks. Many of our residents are seasonal and will be shocked to return and see the condition of their boxwoods. One new friend contacted me a week or so ago about her boxwoods. Brian even went to check them out, but they were too far gone to save. The owner was devastated because these 50-year-old boxwoods were her grandmother’s. Take a look...
Picture
Picture
Picture
Picture
Picture
Picture
Picture
Picture
Picture
Picture
Picture
Picture
Picture
Picture
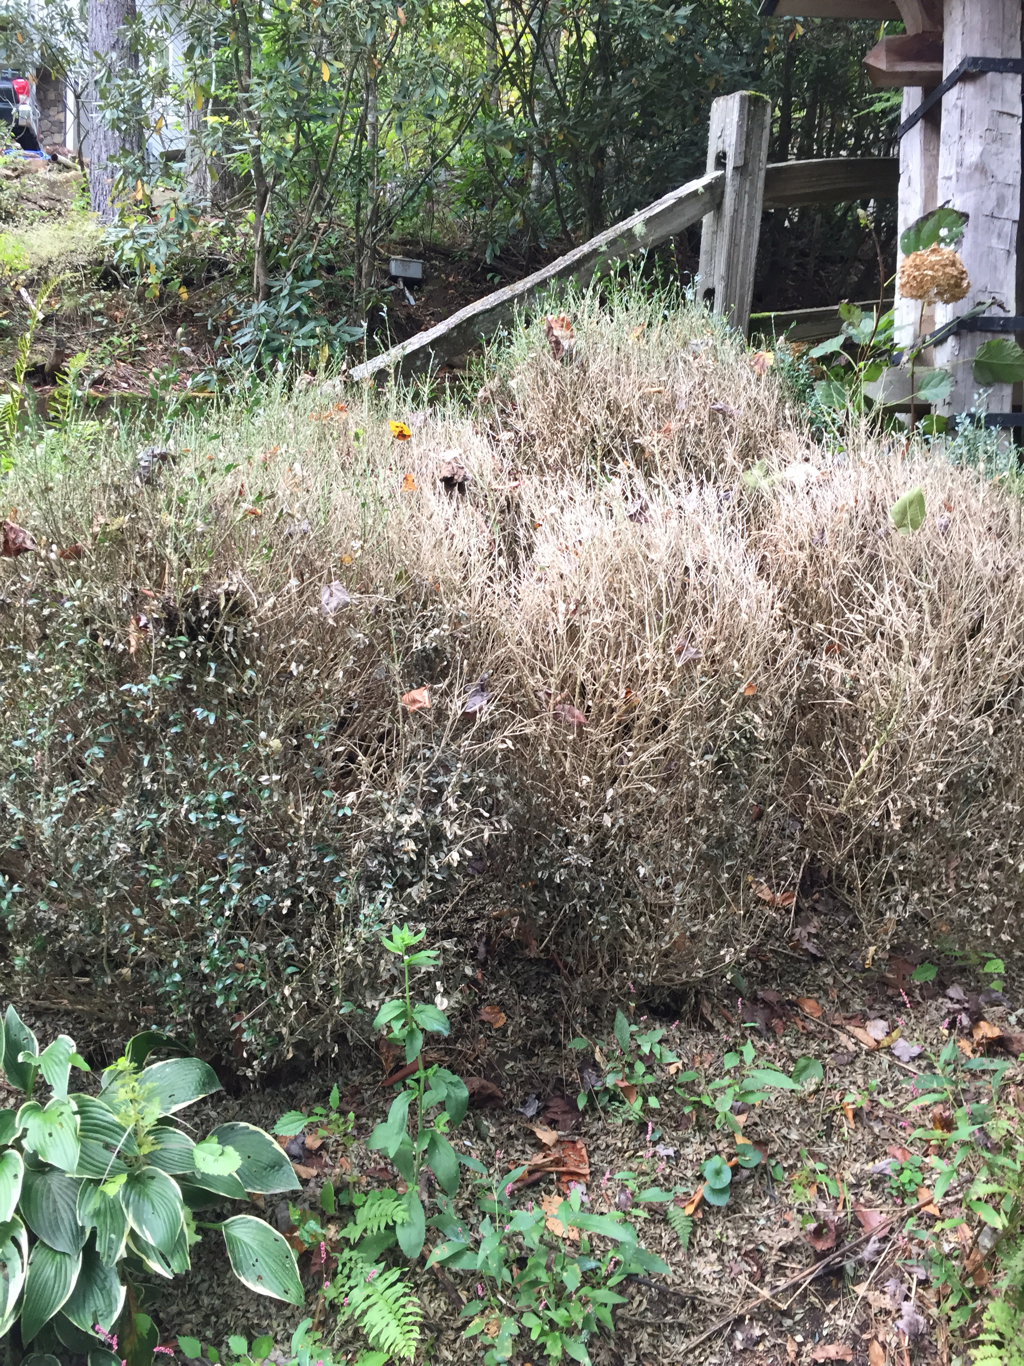
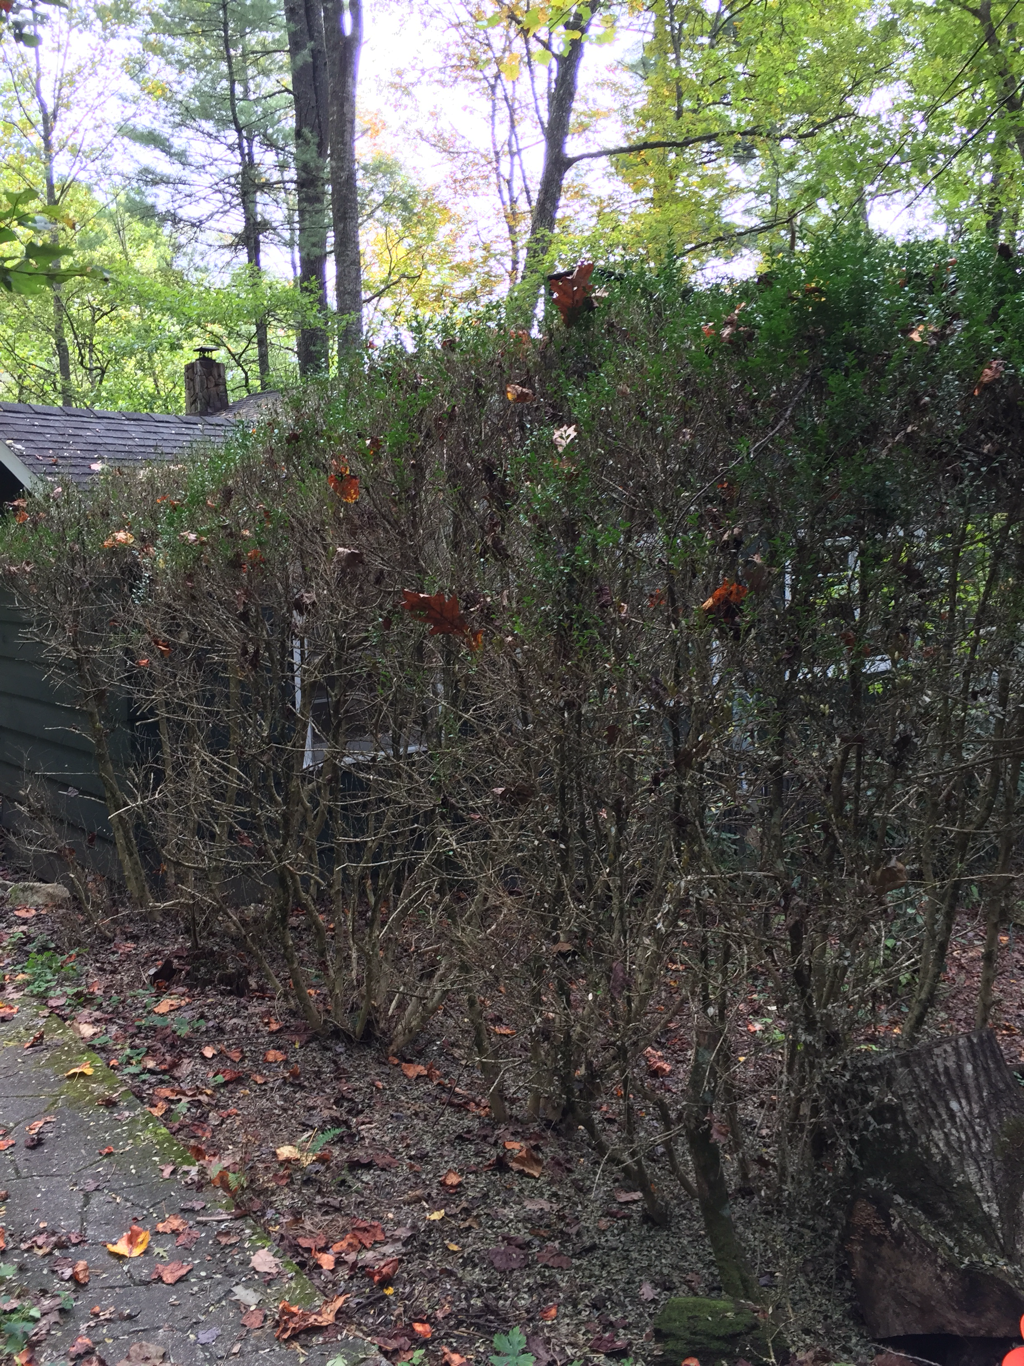
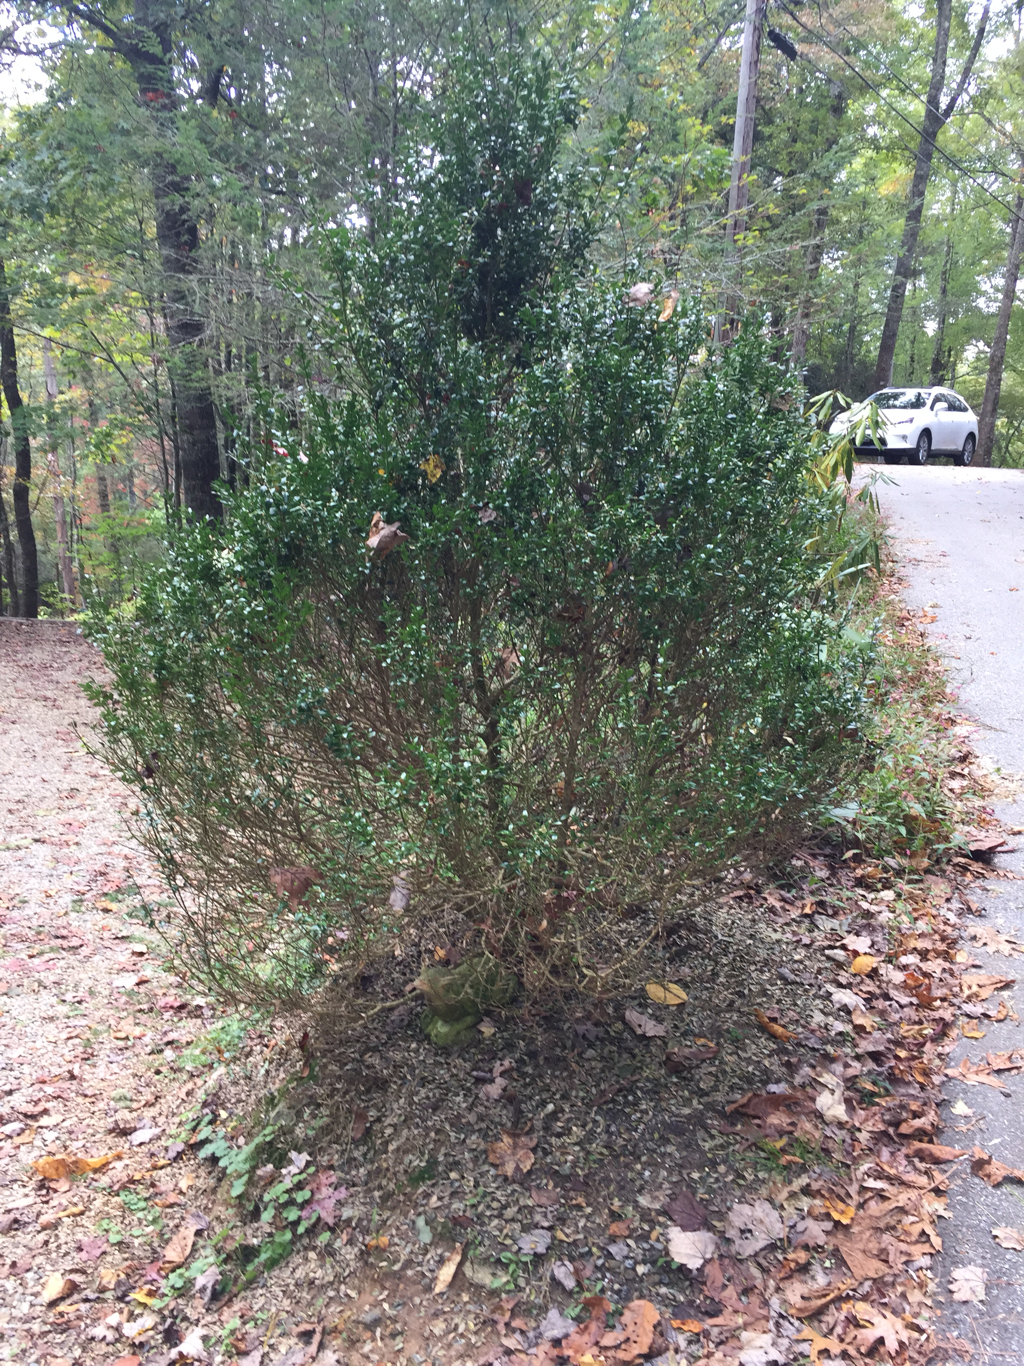
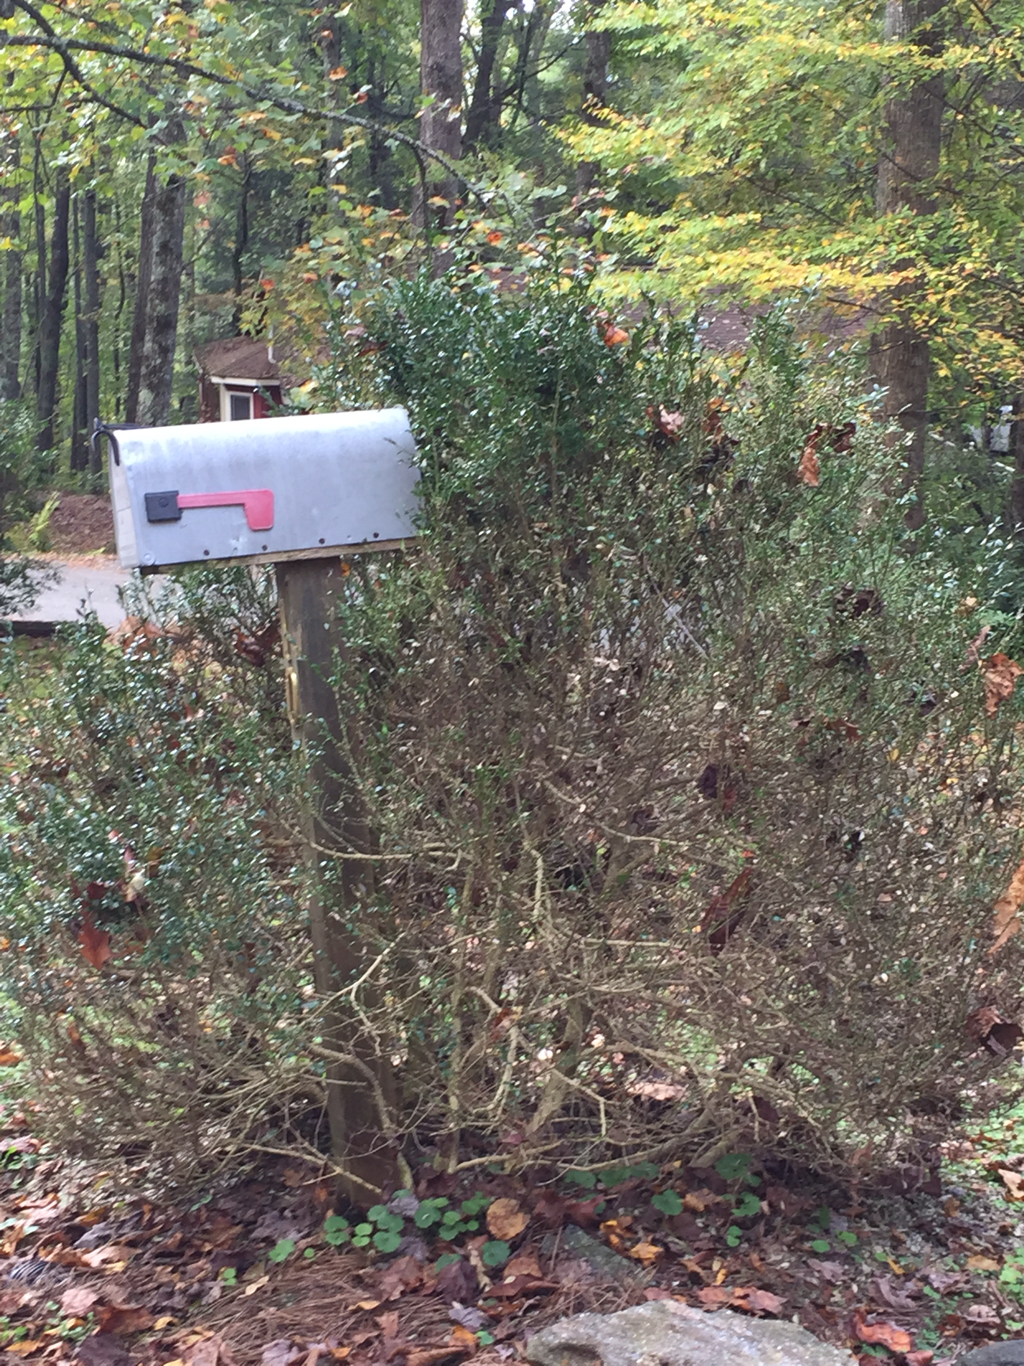
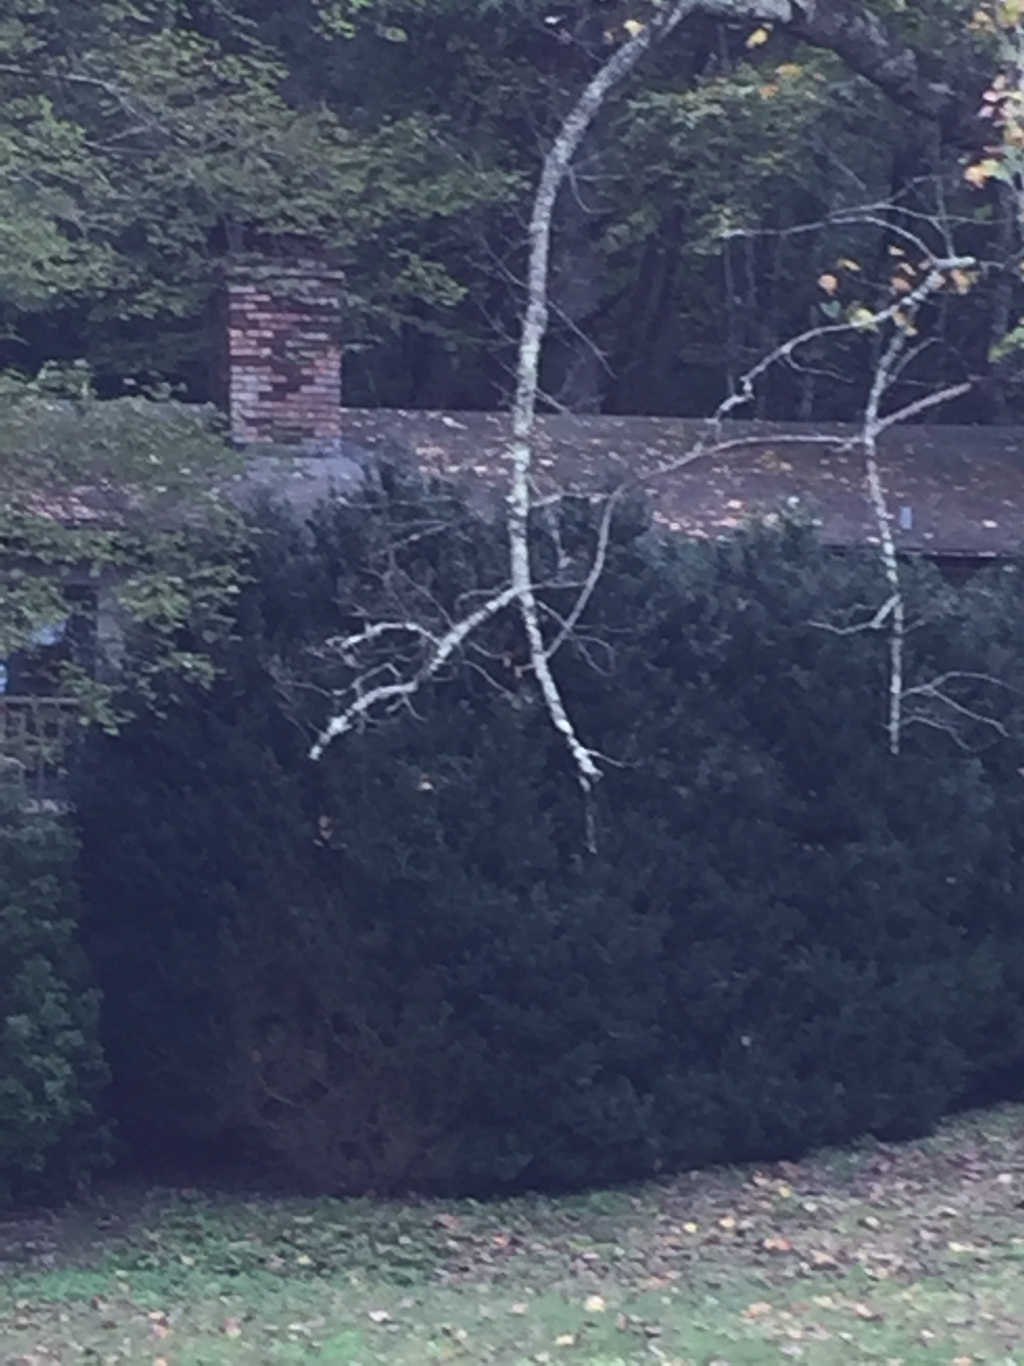
All of the pictures above were taken in our neighborhood. The pictures show blight at various stages, but I know, without a doubt, if left untreated every single boxwood will die. Brian says, “It’s not a question of IF untreated boxwoods will die, but rather it’s a matter of WHEN they will die.” And he clarified that he meant whether it currently has Boxwood Blight or not!
And here’s the plan Brian shared...
Picture
Daconil is a contact fungicide and Tebuconazole is a systemic fungicide. The combination of these two products treat the shrub from the outside and from within. YOU NEED BOTH!

Mix the chemicals in a 1-gallon or 2-gallon pump sprayer:
1. Daconil: 1 oz/gallon of water
2. Tebuconazole: 1 oz/gallon of water

These chemicals can be mixed together in the same tank. In the case of a 2-gallon sprayer, you will mix 2 oz of each chemical in 2 gallons of water. Spray the boxwood to the point of runoff, covering all sides of the shrub. These fungicides are safe and will not harm the shrub or other plants in any way. You can’t spray too much.

Boxwoods should be sprayed every 21 days during the months of April-October. No spraying is required from November-March. (Note: since I had infected boxwoods and it was so close to the end of the spraying season, Brian advised that we go ahead and spray weekly.)

Thank you, Brian! I’ll be making you a homemade thank you treat very soon!
1 Comment

We’re fired up!

10/11/2018

1 Comment

 
Phil and I decided to go ahead with a project we had planned to complete in 2019 and we’re glad we did. We now have a nice fire pit behind Two Holt. All of our flat spaces had been claimed—- the house, the sitting garden, the potting bench, Boots’ Run, parking. So we called our friend and grading contractor, Mark Rogers, to carve a large flat area out of the sloped lot behind our house. And he agreed to the job.
Mark started the job and Phil staked out his observation stations!
Picture
Breaking ground for the Fire Pit project
Picture
Phil’s observation stations
I had walked the land with Mark and shown him pictures and drawings two or three times prior to the beginning of the job so I was fairly certain he understood what I wanted. At the end of the first day, I KNEW we were in sync.
Picture
End of first day
The next phase was to bring in the large stones to build the back retaining wall and a smaller retaining wall in the front.
Picture
Carrying in the big rocks
Picture
Looking good
Mark worked for a week creating our fire pit and the beginnings of walking paths through the back lot to the road behind Two Holt.
Picture
Mark’s job is done
Mark dug down a bit for the actual pit.
Picture
The fire pit
Picture
Here’s the first look of the fire pit from the woodland behind it
Phil and I tried out the fire pit and immediately knew this would become our favorite outdoor spot.
Picture
Our first fire
We began planting our Fire Pit Garden with plants we bought on clearance at Lowe’s which included three Dwarf Alberta Spruce trees...
Picture
...a red twig dogwood...
Picture
...a Kaleidoscope abelia...
Picture
...and several Rain Forest Morning hosta.
Picture
I planted three Creeping Jenny plants in the retaining wall and will add many more plants as it becomes another living wall comparable to the one we created in a front garden near the road.
Picture
We also planted a white blooming hybrid rhodie, Bloom Struck Hydrangea, and a Red Dragon Japanese Maple in the Fire Pit Garden.
We began a Woodland Path Garden along the lower path leading away from the Fire Pit Garden by planting one Nana Cryptermia, four Lemon Lime Nandina, and a burning bush. Creating this garden will be an ongoing project as we add shrubs and understory trees beside the paths along with benches, a swing, and chairs to create garden destinations all the way to the very back of our property.
Picture
Next it was time to spread gravel over the ground within the fire pit sitting area. This was a tough job for Phil and me. We unloaded over a full ton of gravel from Phil’s truck and carried it bucket by bucket up endless steps to the fire pit area.
Picture
Shoveling gravel out of the truck
Picture
Into the buckets
Picture
Up the side steps
Picture
Across Boots’ Run
Picture
Up more steps
Picture
Dumping on the sitting area
We found comfortable Adirondack chairs on a trip to Gainesville, Georgia. We bought four chairs (two are swivel glider chairs) and two small tables. But then we had to unload that VERY heavy furniture and carry it up to the fire pit.
Picture
Unloading the furniture
Here’s a view of the fire pit from the upstairs guest bedroom...
Picture
View from upstairs guest bedroom
And here’s the fire pit as we enjoy it today. You can see the tree stump grinder has not shown up yet. Hopefully he’ll be here soon.
Picture
A relaxing place to enjoy
Picture
That’s my chair with my hot chocolate on the table waiting for me
Picture
Phil loves to poke around the fire
Picture
And he loves to relax in his glider Adirondack.
We still have finishing touches to add. I’ve ordered lumbar pillows for the chairs and we plan to add another whiskey barrel planter to this area. I’m on the lookout for a few other large pots to add, too. Next spring our gardening efforts surrounding this area will intensify. I hope to achieve a nestled-in-the-woodland look. Happy gardening, everyone!
1 Comment

    Phil & Sharon

    Married 40 years and hoping to enjoy many more!

    Archives

    August 2019
    July 2019
    June 2019
    May 2019
    April 2019
    March 2019
    February 2019
    January 2019
    December 2018
    November 2018
    October 2018
    September 2018
    August 2018
    July 2018
    June 2018
    May 2018
    April 2018
    March 2018
    February 2018
    January 2018
    December 2017
    November 2017
    October 2017
    September 2017
    August 2017
    July 2017
    June 2017
    May 2017
    April 2017
    March 2017
    February 2017
    January 2017
    December 2016
    November 2016
    October 2016
    September 2016
    August 2016
    July 2016
    June 2016
    May 2016
    April 2016
    March 2016
    February 2016
    January 2016
    December 2015
    November 2015
    October 2015
    September 2015
    August 2015
    July 2015
    June 2015
    May 2015
    April 2015
    March 2015
    January 2015
    December 2014
    November 2014
    September 2014
    July 2014
    June 2014
    May 2014
    April 2014
    March 2014
    February 2014
    January 2014
    December 2013
    November 2013
    October 2013
    August 2013
    July 2013
    June 2013
    May 2013
    April 2013
    March 2013
    February 2013
    January 2013
    December 2012
    November 2012
    October 2012
    September 2012
    August 2012
    July 2012
    June 2012
    May 2012
    April 2012

    Categories

    All
    Easter Decorations
    Garden Signs
    Shadow Of The Bear
    Whiteside Mountain

    Categories

    All
    Easter Decorations
    Garden Signs
    Shadow Of The Bear
    Whiteside Mountain

    RSS Feed

Powered by Create your own unique website with customizable templates.